/blogs/journal.atom Âé¶¹¹ú²ú - Journal 2025-11-06T16:13:28-05:00 Âé¶¹¹ú²ú /blogs/journal/rsvp-holiday-tablescape-workshop-with-parcel-flower-co 2022-10-26T12:24:13-04:00 2022-10-26T13:27:26-04:00 Holiday Tablescape Workshop with Parcel Flower Co. Sierra Steifman More

]]>

Join Âé¶¹¹ú²ú & and ring in the season with a ! Led byÌýSierraÌýSteifman, founder of boutique floral house Poppies & Posies and Âé¶¹¹ú²ú, this workshop will teach you how to create low, lush floral centerpieces for your holiday celebrations.

Utilizing seasonal flowers, foliage, and Âé¶¹¹ú²ú’s vessels and tools, we welcome you to join us in the meditative art of arranging flowers and the ritual of lighting candles ahead of your next gathering. The seasoned experts at Âé¶¹¹ú²ú will share tips on curating candles and how to style your table with candlelight to create a warm ambience for guests.

This workshop is open to all experience levels. Each participant will leave with their own centerpieces (flowers + vase) and the confidence to do it again on their own.

The Parcel Flower Co. will generously offer 10% off any in-store purchase on the day of the class!

To RSVP and purchase tickets, please .

We look forward to seeing you soon!

]]>
/blogs/journal/journal-2021-diybouquetinspiration 2022-04-29T15:00:00-04:00 2022-05-11T14:53:38-04:00 Garden-Style Bouquet Inspiration admin

Inspiration for your summertime bouquet. Just-picked or garden-style bouquets have a looseness and spontaneity to them. They often mix leafy branches with a variety of textures, large face flowers, and delicately detailed multi-bloom flowers. We love to cluster like flowers to mimic how they would grow in nature – or in a garden. The overall silhouette is asymmetrical and a little wild. Informal, natural beauty.


BRIDE & BRIDESMAIDS

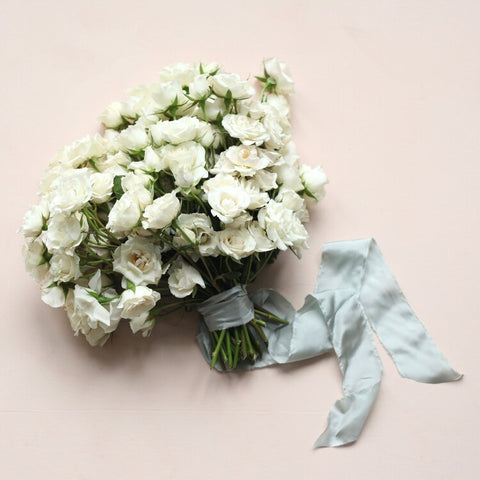
We used the same flowers for the bride and bridesmaids, distinguishing them with scale and number of focal blooms.


FLOWERS USED
peony
garden roses
scabiosa
hellebores
clematis
blueberry
nigela


DIY Bouquet Tutorial

Trying your hand at a DIY bouquet this season? Tap below for guidance. The right technique makes all the difference.

We’d love to see what you make!Ìý

ÌýWhat You'll Need:

  • Japanese Floral Clippers
  • Floral Stem Tape
  • Wedding Workshop
  • 2" Silk Ribbon, Midnight
  • 2" Silk Ribbon, Seafoam
  • 2" Silk Ribbon, Soft White

]]>
/blogs/journal/journal-quickarrangement 2022-03-01T15:00:00-05:00 2022-05-11T14:56:59-04:00 A Quick Arrangement for the Soul admin I can only go so long without flowers, I’ve realized. When I reached that limit this week, I ordered some blooms from . Their arrival was a tangible shift.

Arranging these blooms, I felt focused and grateful. Flowers bring joy and life, beauty and nature into our homes. Even in these overwhelming times, their power is transformative.

I grabbed a few quick snapshots as my arrangement took shape. If you can get your hands on some blooms, click through these images to follow along.

- Sierra

Getting Started : Tools

All of the tools I used are in ourÌýArrangement Workshop.


Step 1 : Base

Tape your floral netting into your vessel with floral tape. I used a flower frog in the bottom, but that’s optional.


Step 2 : Composition

I started the shape of my composition with peach quince, adding hellebores for depth.


Step 3 : Depth

I added peach ranunculus in clusters, continuing to build at various levels.


Step 4 : Pop

A pop of yellow daffodils - clustered to one side for more impact.


Step 5: Delicate

Finish the arrangement with your most delicate detail flower. I used poppies.

Pro tip: If you’re also using poppies, sear the ends of them - rather than cutting. This video will show you how:


Thanks for following along! I hope there are some flowers in your world.

PS. If you want more tutorials, look no further.

]]>
/blogs/journal/centerpiece-tips 2022-02-23T16:00:00-05:00 2022-09-14T14:07:24-04:00 TFS Tips: Centerpiece Setup admin It feels so good to spend the afternoon arranging blooms.

When creating an arrangement of this size, proper vase setup is crucial.


Ìý

Vase Setup 101

This part isn’t glamorous, but so essential! Doing this part right will ensure your blooms last as long as possible and your arrangement stays in place.

Ìý


Ìý

Step 1

Start with a clean, dry vessel. Leftover flower debris creates a breeding ground for bacteria, which shortens the lifespan of your flowers, so "clean" is important!

Step 2

Use a generous amount of floral frog putty to adhere the pin frog to the bottom.ÌýWe use Sure Stik.

Step 3

Create a cylinder or sphere (depending on vase shape) out of TFS floral netting. It's okay if you need to crush it into the vase a little — the pressure against all sides will help keep everything stable.

Step 4

Further stabilize your mechanics by taping it down in a cross with your TFS waterproof tape.Ìý

Ìý

A solid foundation makes all the difference. We hope this helps!

Ìý

Show us what you make — .

Ìý

]]>
/blogs/journal/how-to-create-a-tablescape-in-5-minutes 2021-10-18T16:00:00-04:00 2022-09-14T13:54:06-04:00 TFS Tips: The Five-Minute Tablescape admin

Quick, casual, and virtually foolproof! What’s the secret to a five-minute tablescape?

Bud vases.


Stagger your bud vases with one or two flower varieties in each. Play with height and spacing, add candles as desired, and you’re done!

Ìý

The Details

  • Choose blooms with different textures, weights, and heights.

  • Keep each bloom within the same range of color so that the group looks intentional.

  • A variety of vase shapes will help lead the way. Ours are made for layering!

  • Intersperse taper candles throughout to further marry your composition.


Why It Works

  • Flexible and low pressure: When entertaining, you can move each element about as needed.

  • Long-lasting: If one of your blooms outlasts another, you can swap stems without starting from scratch.

Ìý

One More Thing: Candle Safety

If you’re using candles on your table, this is a must.

Always ensure your tapers are very snug in their holders. Especially with hand-dipped candles, there's bound to be some variation in circumference. That may mean you need to shave the base down a little. If the candle wobbles, use some TFS Candle Helper for extra insurance.

Ìý

Show us what you create! Tag and as always, have fun.

]]>
/blogs/journal/journal-2021-singleflowerbouquets 2021-06-28T16:00:00-04:00 2022-05-11T15:53:40-04:00 TFS Tips: Single-Flower Bouquets admin If planning a wedding is anything but simple, your bouquet can be.

Straightforward and restrained, we love the less-is-more approach of a single-flower bouquet. Whether your overall aesthetic is minimal, or you simply want to let the focus fall on other details, scroll on for our top tips on letting one flower work its magic.

Varieties


PEONIES

Lush and blowsy, a few peonies go a long way to create a ruffly, romantic bouquet. Just make sure to layer them for depth and to give each head room to breathe.


ESKIMO ROSES

A forever classic - roses are elegant and resilient, meaning that if you need your bouquets to last through a warm summer day roses are a great choice!


MAJOLICA SPRAY ROSES

More wild and dainty than your standard rose, a spray rose is a breeze to create a single-variety bouquet with since the blooms are already staggered along their stems in a completely natural way.


LISIANTHUS

The paper-thin petals of lisianthus are surprisingly sturdy, but simultaneously ethereal and delicate. We prefer to remove any green buds as well as any blooms that are still on the green side. It’s hard to let go, but you’ll give the best blooms the chance to shine!


Ìý

How-To

It's easy to veer into flower ball territory when creating a single-flower bouquet, so you'll want to take care to layer blooms from the inside out so as to create depth.

  • Using your non-dominant hand to imitate the mouth of a vase, crisscross a few stems to create the outline of your bouquet shape.

  • Sink a few stems deep into the middle for substance to build on top of. Vary heights and fan the blooms out as you go.

  • To keep things neat and manageable, trim your stems as you work, and wrap with stem tape to stabilize as you go.

  • Remember to do a final cut just before placing in water to rehydrate!

  • If you're making your bouquets ahead of time it's nice to save the ribbon for the day of the event, to keep it from getting soaked in transport.

For visual instructions, tap the video below. With intentional placement, you can still build all the depth and interest of a varied bouquet.

On the Table

The single-flower look lends itself well to tabletops, too. Try layered bud vases with multiple stems of one variety each. Easy, beautiful, done.


For more guidance:

We’d love to see what you make!

— TFS

]]>